Overview
Progressive is a clean, multi-purpose and responsive template. It is suitable for your corporate business sites, a creative agency or a portfolio projects.
Updated: 17/08/2014
Author: NikaDevs
Drupal 7.x
We want to present you a simple and functional template “Progressive”. Optimized and intuitive code using the latest HTML5 and CSS3 technologies allows to make changes in the page structure of the template. More than 200 interactive elements, as well as support for Twitter Bootstrap, are available to your needs. You will get the Revolution Slider for free and rebuild it to suit your website. By purchasing our template you will get the most valuable thing – our time to solve problems that may arise while setting up a template.
Images showed on the theme is only for demonstration.
Full Drupal Install with demo content
This instruction are for people that have experience manually installing Drupal and importing databases. If you do not feel comfortable performing these steps yourself, contact your server administrator for help. WARNING Do not import the provided SQL file into an existing Drupal database or you will lose all existing data.
Full Drupal installation comes without images, which was only for theme demonstration.
After purchasing theme, you will get a download package. Extract the archive somewhere on your computer.
Click here to watch the VIDEO INSTRUCTION OF INSTALLATION PROCESS
-
Create a database for this installation of Drupal and import the SQL file
progressive_database.sql. The PhpMyAdmin might be helpfull for manaing your databases. If importing theprogressive_database.sqlfile was unsuccessfull, please try to import theprogressive_database_v2.sql -
Copy the entire contents of the
Drupal_7folder to the location on your web server where you want your site to be accessed. If you want your primary domain to point to your install of Progressive, copy everything to the root folder. If you want your site to be accessed as a subsection of your domain (for example: yourdomain.com/drupal) then simply rename theDrupal_7folder to the desired name and upload to the root of your server. -
Folow this instruction to configure the
/sites/default/default.settings.phpwhich should be renamed tosettings.php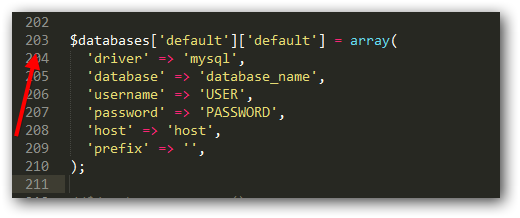
- Login to your site with the username Admin and the password Admin and visit admin/people to change the admin username and password.
- Go through the Drupal configuration found in admin/config options and update all the necessary information to reflect your website. Also be sure to visit /admin/config/media/file-system and update the Files Directories.
Installation for existing sites
Extract the downloaded theme archive somewhere on your computer.
Folders modules contain all described below modules.
The list of required modules:
- ctools - Chaos tools (required by many modules).
- features - Features (Importing Progressive theme features).
- link - Link CCK fields.
- shortcode - Shortcode integration.
- token - Token module (required by Pathauto).
- views - Views module.
- media - Media widget for Image field.
- date - Date field for nodes.
- file_entity - File Entity is required by Media module.
- jquery_update - jQuery Update.
- shortcode - Shortcode functionality.
- progressive_cms - Progressive theme module.
- progressive_shortcodes - Progressive Shortcodes.
- nd_visualshortcodes - NikaDevs Visual Shortcodes.
- nikadevs_cms - NikaDevs Main Features.
The list of optional modules which are integrated in this theme:
- admin_menu - Usefull administrion menu
- pathauto - Pathauto (SEO friendly URLs).
- retina_images - Retina Images, high resolution images for retina displays
- ckeditor - CKEditor is a WYSIWYG editor.
- imce - IMCE module allow to upload images in CKEditor.
- tb_megamenu - Mega Menu.
- md_slider - Mega Slider.
The list of core modules which are used:
- block - Block
- comment - Comments
- contact - Contact Form
- search - Search Form
The list of required modules for Ubercart Shop:
- ubercart - Ubercart
- entity - Entity required by Ubercart
- rules - Rules required by Uberart
- fivestar - Fivestar used in Product pages
- flag - Flag used for Compare and Wish lists.
- votingapi - VotingApi required by Fivestar
- views_filpped_table - Flipped View Table. Used for Compare products page.
- session_api - Session API. Allow annonymous to use the Flag feature.
The list of modules for importing content:
- blockexport - Block Export Feature
- node_export - Node Export Feature
- uuid - UUID required for Node Export
Upload files:
-
Upload from
theme_onlyfolderprogressiveto your site folder in/sites/all/themes - Upload from modules all required modules to your site in /sites/all/modules folder.
- Upload from libraries all libraries to your site in /sites/all/libraries folder.
Go to the Modules page admin/modules and enable all required modules described above.
Please make sure what you are have enabled next modules before enabling the theme:
- Progressive theme module.
- Progressive Shortcodes.
- Progressive Features.
- NikaDevs Visual Shortcodes.
- NikaDevs Main Features.
Login to your Drupal site and go to admin/appearance enable the Progressive Sub Theme theme and set it as the default theme.
Go to jQuery Update page admin/config/development/jquery_update and set the Default jQuery Version to 1.10 and 1.8 for Admin theme. Go to the /admin/appearance and make sure that you selected the "Use the administration theme when editing or creating content" checkbox and Admin theme is SEVEN (not required, just make sure that you are not using the same theme for front end and backend).
Import Content
Make sure what all required modules are enabled: features, block_export, node_export and uuid.
Open Modules page: admin/modules and enable the Progressive Content module
- If for some reason there is still no Progressive content, go on the Features page: admin/structure/features, disable the Progressive Content feature in the NikaDevs section. After this simply enable it.
Progressive Sub Theme
Progressive comes with a sub-theme called Progressive Sub Theme that you can use to make customizations to the style and template structure of the parent theme without having to modify the parent theme itself. This is very useful then you will update the Progressive theme as we release updates.
There is an empty stylesheet in sites/all/themes/progressive/progressive_sub/css/__custom.css. Rename this file to custom.css and add your custom code on this file.
You can also copy any template file from the sites/all/themes/progressive/templates folder into the sites/all/themes/progressive/progressive_sub/templates folder and drupal will use Custom theme template.
Theme Settings
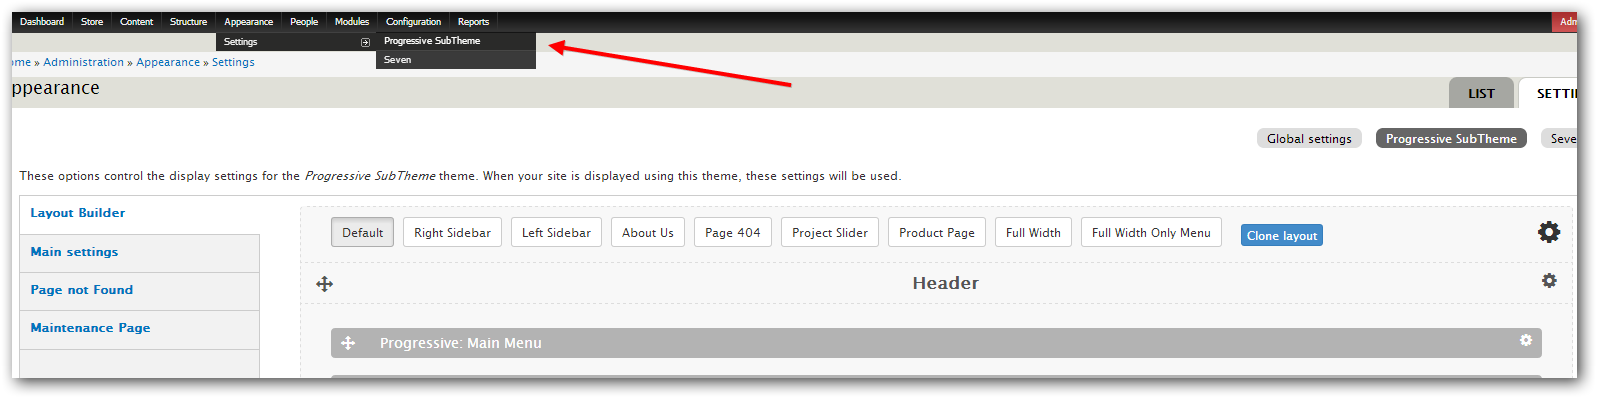
Visit your theme setting page admin/appearance/settings/progressive_sub or admin/appearance/settings/progressive if you are not using Sub Theme, to edit your theme's settings.
-
Layout Builder this is a main tool which you need for creating the site structure. More information in Layout Builder section
-
Main Settings section:
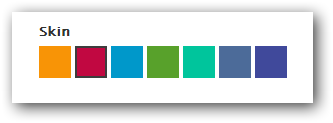
Setting Description Skin Allow you to change color scheme. By default the Skin is Red.
Enable Retina Script Enabling Retina Script, which for each image will looking if there is exists image with suffix @2x and will use it instead of the original version. This is working only for Retina Displays and for images which are not controled by Drupal Image Styles.
Boxed View Change page view from Full Width size to Boxed.
Header Top Menu Enable the Menu above the Main menu, which appears on mouse hover event.
My Account & Login, Wishlist, Compare list, Cart & Checkout - enables the corresponding links on this menu.

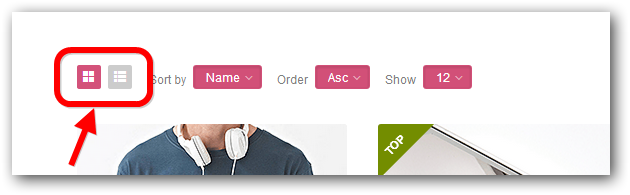
Shop Link, Shop Link, style List Edit this links if you changed your Shop links, they are used on the grid-list switching links:
-
Page not Found allow you to change view of the Page not Found:
- 404 in Circle:
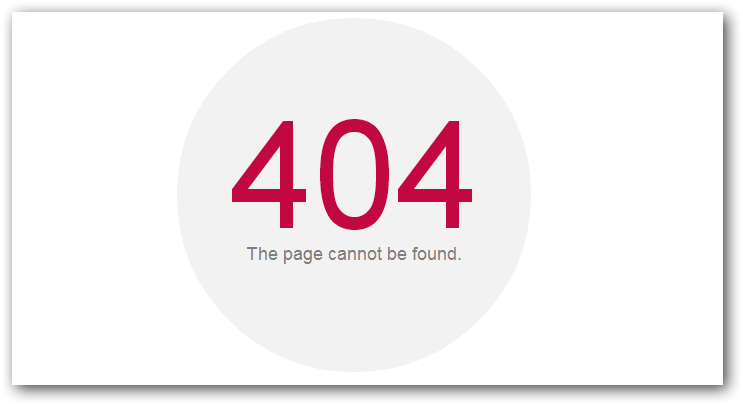
- 404 in Circle with Text:
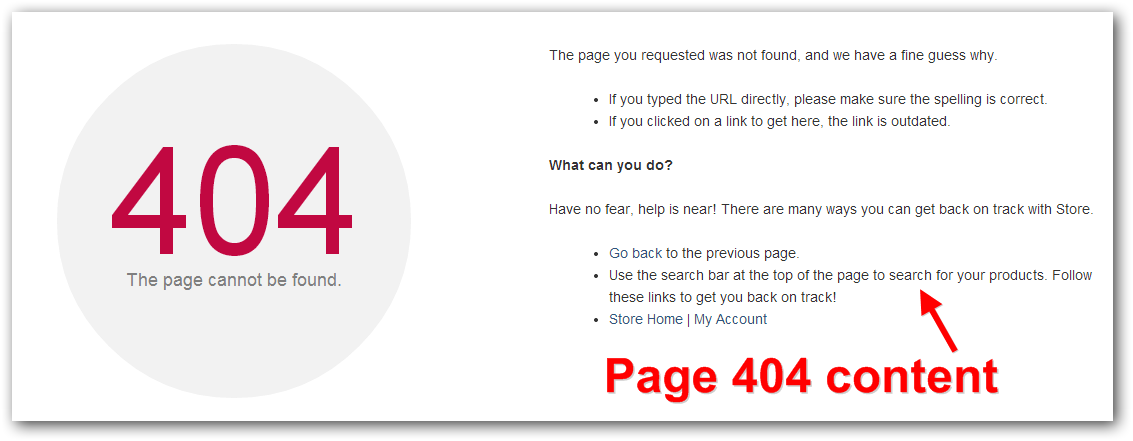
- Background Image:
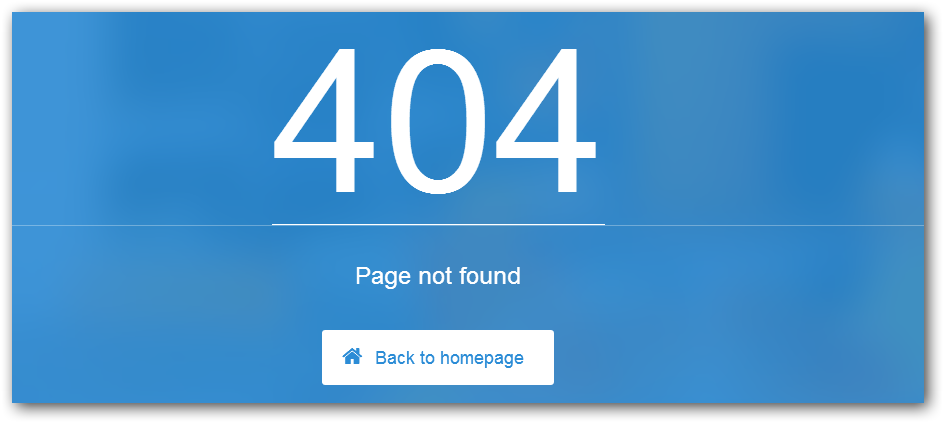
- 404 in Circle:
-
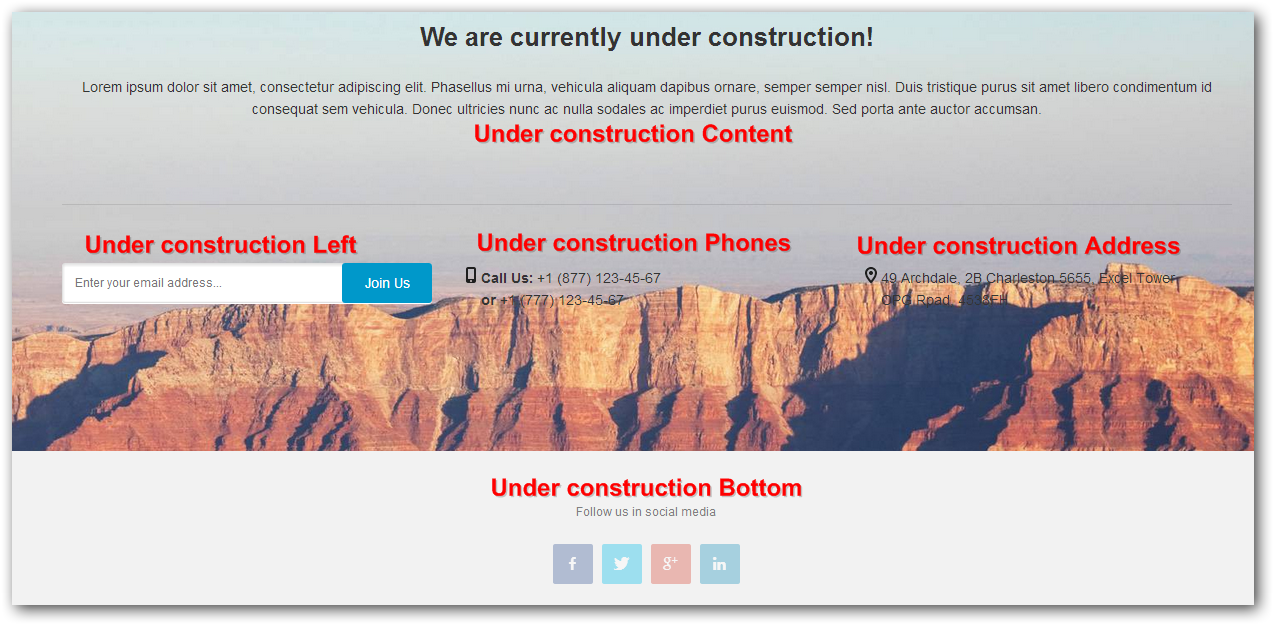
Maintenance Page allow you to change the type and view of the Maintenance Page:
- Coming Soon:
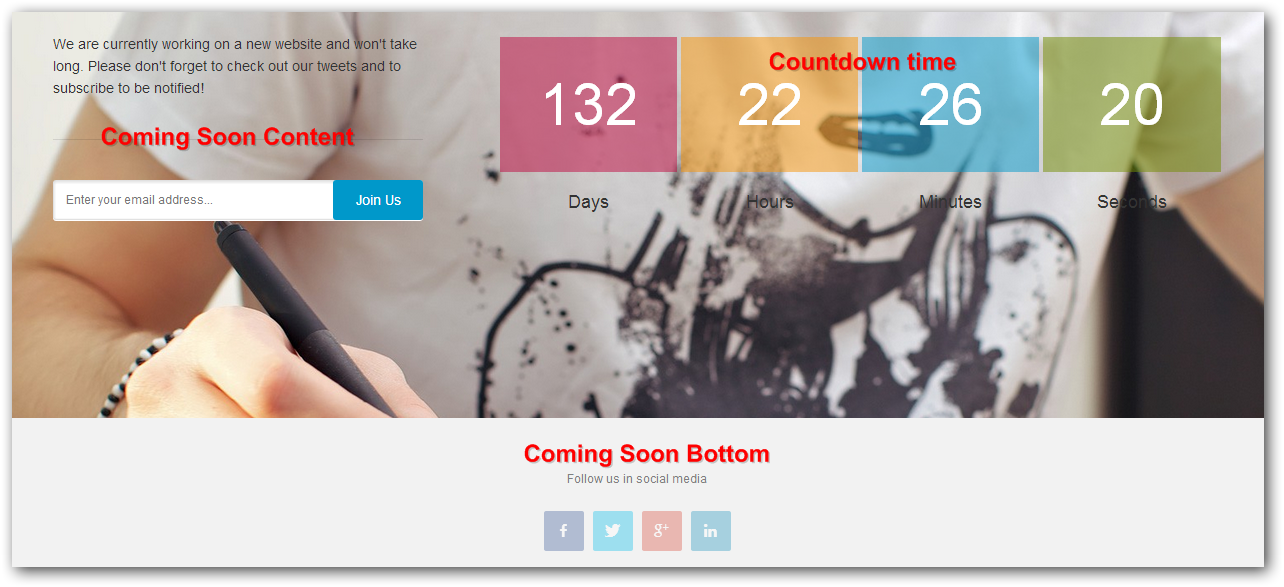
- Under construction:
- Coming Soon:
Management Pages
Progressive theme comes with a management pages for each node type, where you can add/edit/delete nodes.
You could enable Admin menu module to get a fast access to these pages:
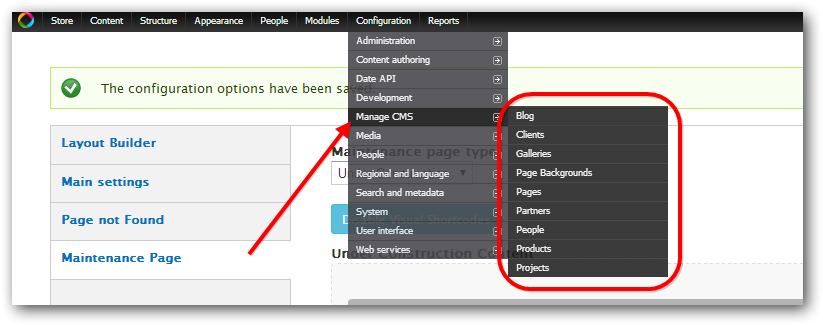
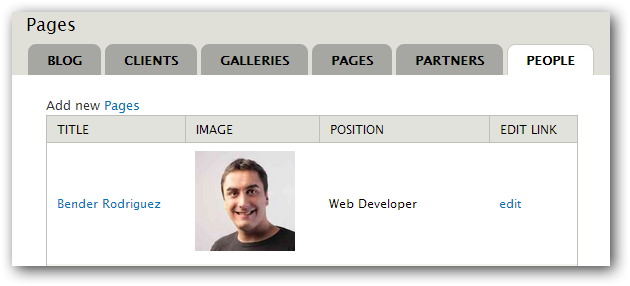
At the top on the each page you could see the link to add new Node. Below will be showed list of added nodes of this type, with links to edit them:
Site Content
Most of the site features stored in the blocks, so you can easily build your page using Layout Builder or Visual Shortcodes
But also there is a pages with dynamical content, which you can edit in Management Pages.
They are controled by Views, so you can found and edit them on the Views Page: admin/structure/views

For example you want to create a new Gallery page with 3 Columns, and link to this page in Menu:
- Go to Main Menu settings page: admin/structure/menu/manage/main-menu
- Click on the Add Link button:
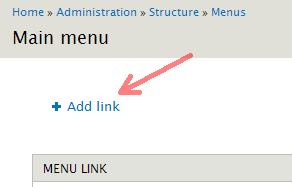
- Enter title Gallery and URL: gallery-3-column. Other settings leave by default. Click Save.
The URL you can take from the View edit page:
- On the redirected Main Menu settings page, drag your item there you need and click Save Configuration.
- Now your item appears in the Header menu, and showed Gallery Items in 3 columns.
If you want to change URL to another, for example gallery:
- Go to Gallery 3 Cols settings page: admin/structure/views/view/gallery/edit/page_2
- Click on the Path link under Page Settings:
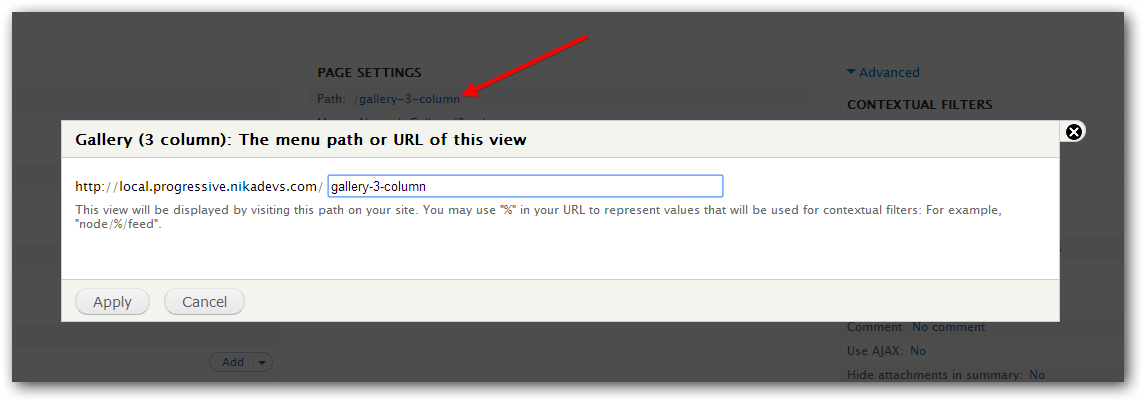
- Enter gallery in the textfield and click Apply.
- Now save settings by clicking the Save on the top right corner of the page.
- If you are already created menu link for this page, then use Edit link in front of the Porfolio menu link on the Main Menu settings page, to change URL to new Gallery.
- Please note what if you are showing some specific blocks or using layout of Layout Builder for this page, then you need to edit their Show on pages fields.
Shortcodes
Shortcodes are actually macros to be used in the text of contents. These macros change the text of the content and format the given part through the theme engine. Using them you can easy create complex elements such Accordion, Tabs, Quotes and others.
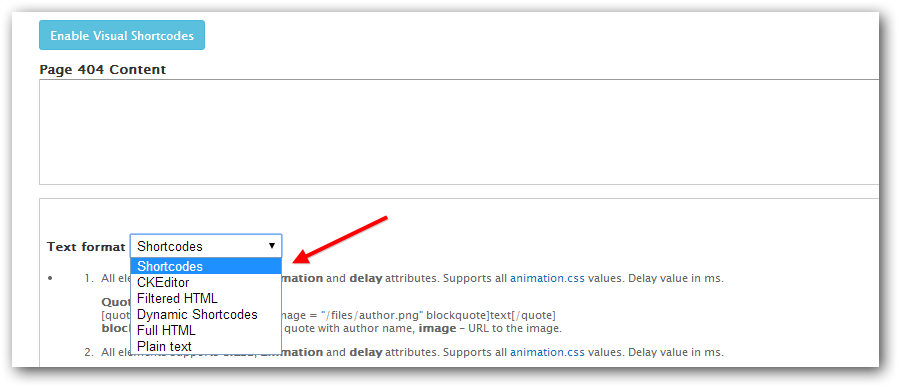
Then you edit textarea, select Text format to Shortcodes or Dynamic Shortcodes
You can manually add/edit any shortcode for each Text Format on it's configure page admin/config/content/formats.
The cache disabled for Dynamic Shortcodes text format, so you can use View, Node, Block, Contact and other shortcodes with dynamical content.
Visual Shortcodes
This theme comes with amazing Visual Shortcodes module which allow you to add/edit/delete shortcodes without typing the code.
Before using this module open the settings page and configure it as you wish: admin/config/content/nd_visualshortcodes
- Autostart Visual Shortcodes editor - Visual Shortcodes will be automaticaly loaded and ready to work once the page will be loaded, so you don't need to click on the "Enable Visual Shortcodes" link.
- Confirm to delete shortcode - Will show up the confirmation window each time then you deleting any shortcode.
- Enable for next Text Formats - Visual Shortcodes will appears only for this formats.
- Default HTML tag Format - Configure which format will be used for HTML shortcode. By Default this is CKeditor format, which is configured to work with CKeditor, but you may install any other WYSIWYG editor.
Short description of main options:

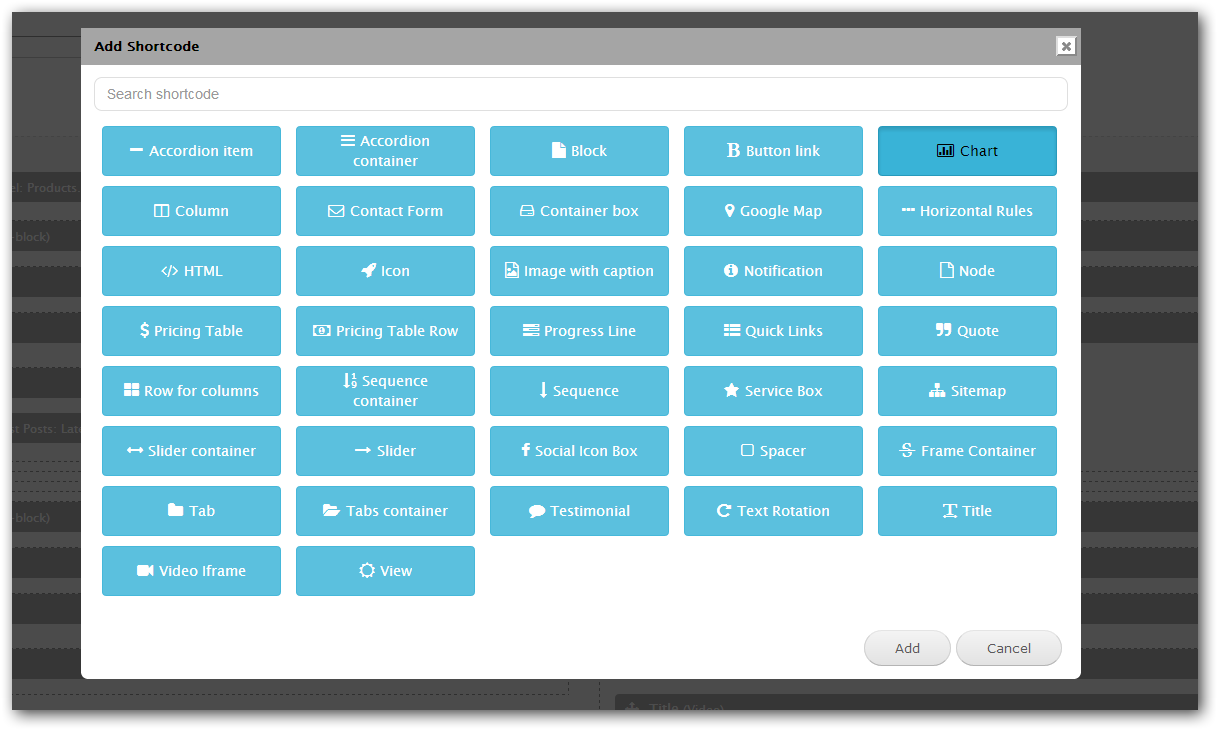
To add new shortcode click on the add shortcode icon, and will be loaded window with all allowed shortcodes. You can also type shortcode name in the search field and all not related shortcodes will disappers. Click on the required shortcode and on the "Add" button:
Shortcode edit sections which appears then you clicked on the edit shortcode icon:
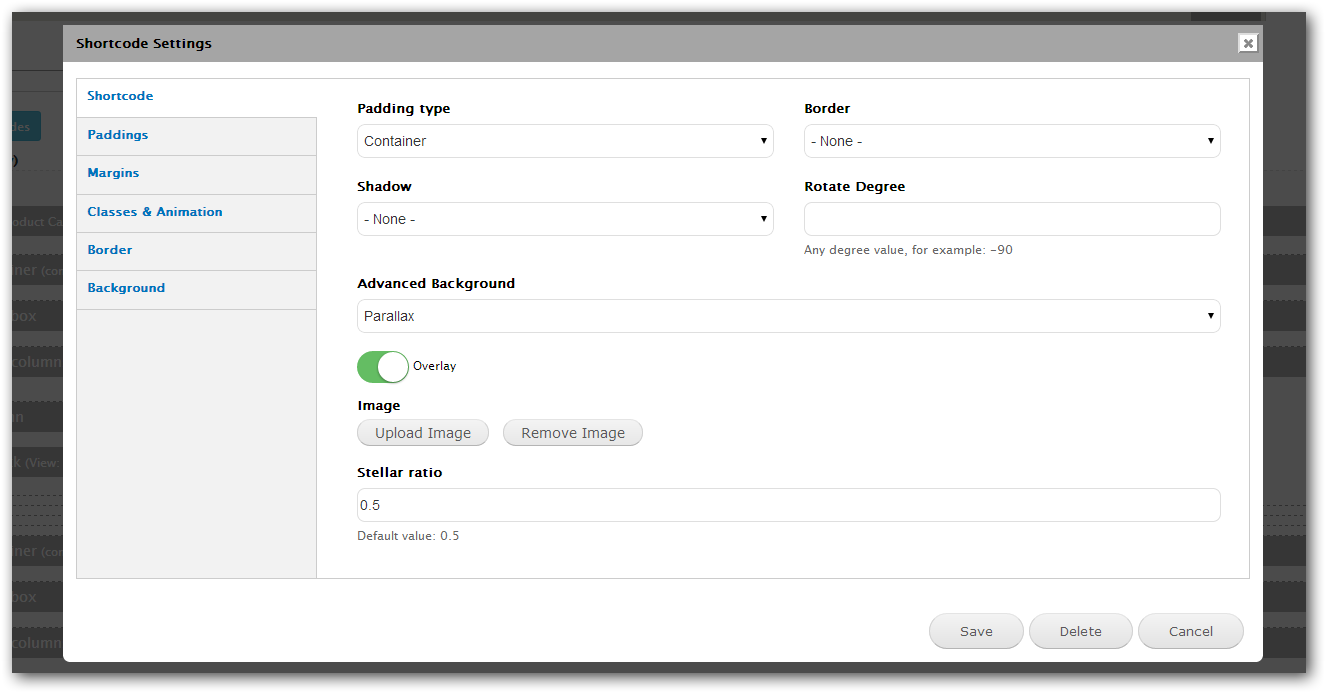
- Shortcode - Showed individual shortcode settings if they are exists.
- Paddings - Edit shortcode container paddings.
- Margins - Edit shortcode container margins.
- Classes & Animation - Here you can add extra classes, setup text align, block animation and block animaton delay.
- Border - Allow to setup border and border radius.
- Background - Allow to setup background color or background image.
Some shortcodes should be used in combination, so if you clicked to add shortcode inside those shortcodes, by default you will see shortcode which should be inserted:
- Accordion container - Accordion Item
- Pricing Table - Pricing Table Row
- Row for columns - Column
- Slider container - Slider
- Tabs container - Tab
By default the View, Block, Node, Quick Links, Contact Form shortcodes enabled only for Dynamic Shortcodes format. So you will not see them if selected "Shortcodes" format - because this is static and cached format.
For enabling "Dynamic Shortcodes" format click on the "Disable VisualShortcodes" link and you will see textarea with "Text Format" selectbox. Select the "Dynamic Shortcodes" and click on "Enable Visual Shortcodes". Now you are able to use all dynamic shortcodes.
Layout Builder
You can find Layout Builder on the Theme Setting page:
The video overview of main functions: YouTube
The Layout Builder allow you to create any structure for any page, using Drag and Drop elements.
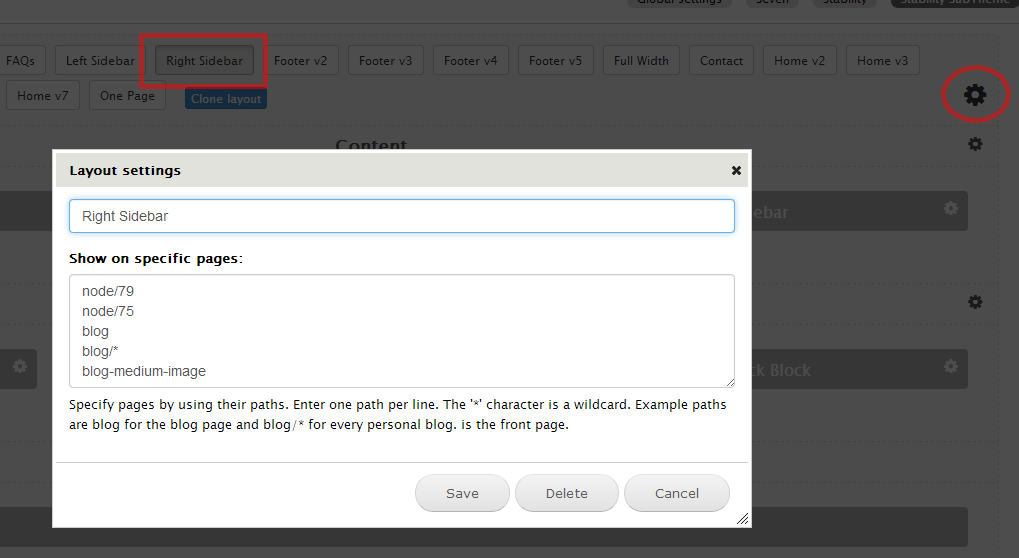
You can configure default layout and layout for some specific page or pages.
Each layout have name and Show on Pages field, there you can enter any URLs there is this layout will be used.
Layout have 3 type of elements:
-
Row - used for combining elements, also by default they styled in the theme with standart theme spacing.
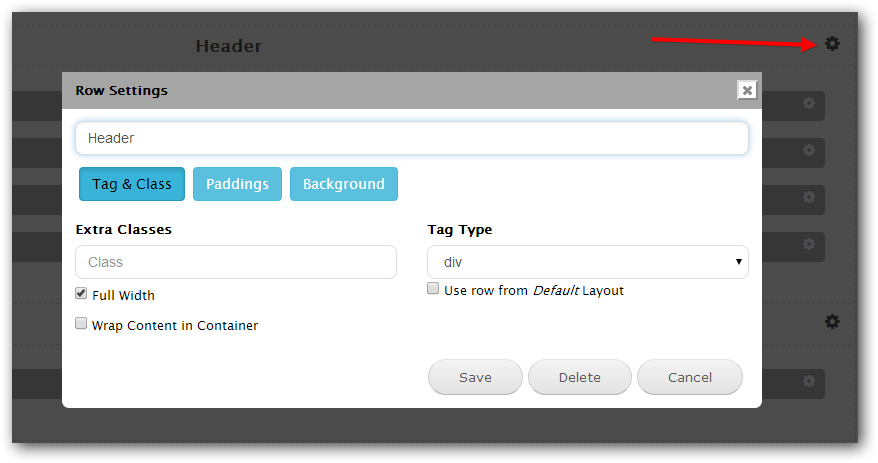
You can assign extra classes for styling, setup Paddings, change Tag type or disable it, and set this row as Full Width.
If User row from Default Layout option selected, then LayoutBuilder will search in the Default Layout the Row with the same name and will use it settings and regions. This may be helpfull if you want to use the same Row in many pages, for example Footer.
-
Regions - Theme regions, which can have a many blocks inside. Think about this like about grouping required blocks inside, or showing blocks which are the same on the all pages.
To configure regions blocks visit default block settings page: admin/structure/block
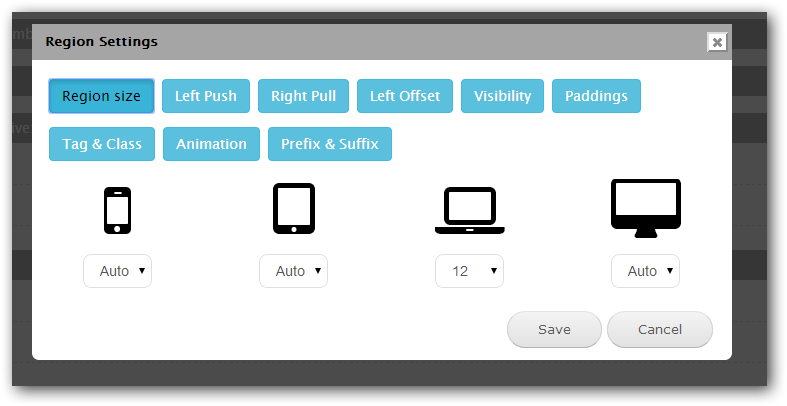
Region supports responsibility, and there is all list of options to configure how many columns it will take on any device, and if it will be showed/hidden.
You can assign extra classes for styling, change Tag type or disable it, and select Animation with Delay of the animation. -
Blocks - Drupal available blocks. Use this then you need to show only one block, and not the whole Region.
Block have the same settings which have Region.
If you want to remove block - simply put it in the Hidden row and on the next page load it will be removed.
One Page
One page will be rendered if the Layout Setting One Page View will be selected.
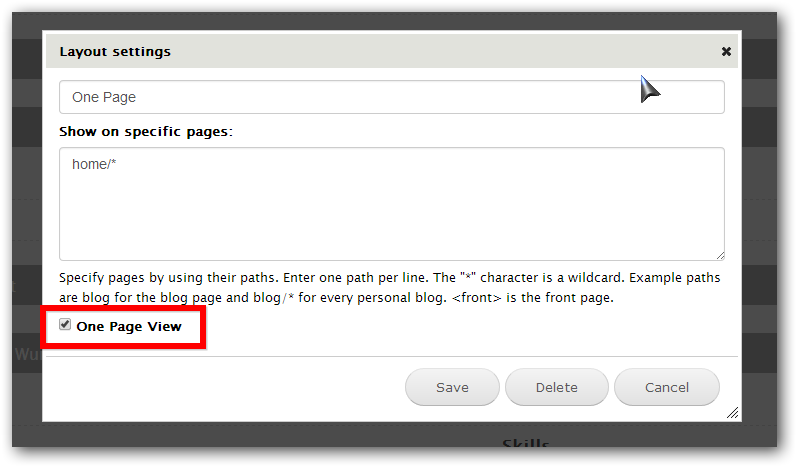
For generating menu will be used Rows names from Layout Builder. In the case if you want to create Row, but don't want to show it name in the menu you need to select checkbox Hide title from Menu.
The Row Settings below will appears if Layout have checked One Page View option.
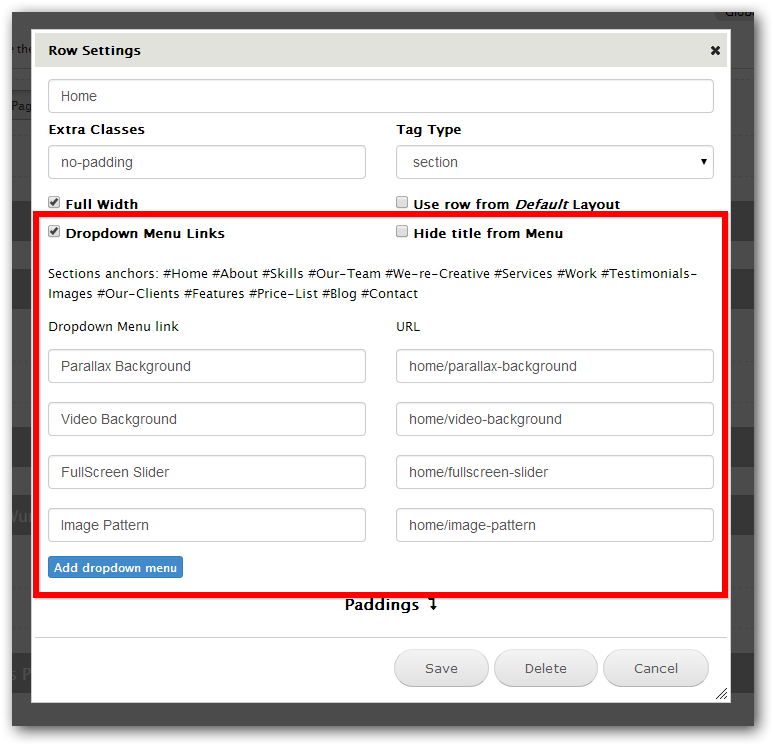
Use option Dropdown Menu Links to create the dropdown list of links which will appears then user will hover mouse over the menu item:
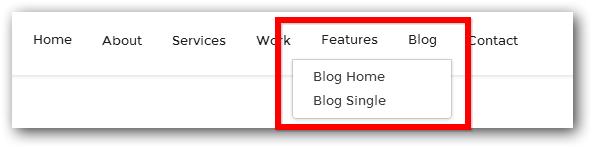
You are able to link the drop down link to some page or to any One Page section.
List of available sections anchors in front of label Section achors.
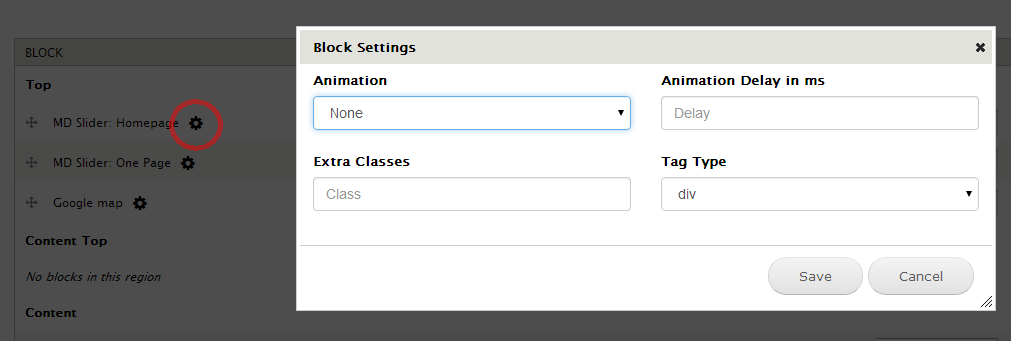
Block settings
You can add extra settings for any available in the system block: admin/structure/block.
This is usefull then you showing many blocks inside one Region.
You can assign extra classes for styling, change Tag type or disable it, and select Animation with Delay of the animation.
Mega Slider
Detailed Mega Slider documentation here: Link
Retina Images
- Make sure what module Retina Images is enabled.
- Go to Image Styles page: admin/config/media/image-styles
- Here you can enable Retina support for required image styles.
- Click the edit link on required style, on the opened page click on the edit link in front of the first effect.
- Select checkbox Retinafy and cllick Update effect
- If you are using Retina effect for all images it's recommended to setup JPEG quality to 35 in Image ToolKit page: admin/config/media/image-toolkit This will reduce the image size.
This module will control all images which are uploaded under fields by Drupal forms. If you are uploaded image by FTP or WYSIWYG, and using it, for example, in some page body, then you need to upload in the same directory the high-resolution image with suffix @2x and select Enable Retina Script option on the Theme Setting page, in the Main settingssection.
Ubercart Shop
Make sure what all required modules are enabled: ubercart : Cart, Checkout, Order, Product and Payment, entity, rules, fivestar and votingapi.
Once you have enabled this modules and progressive_features, the Product Administration page, Product node type and Taxonomy Catalog will be imported and ready to use.
Go to the Store settings page: admin/store/settings and adjust the store settings.
For more details, be sure to visit the What is Ubercart? page for more info.
Updating Process
Please be carefull when updating your Progressive theme and modules to newest version, and always made Backups of code and database. Use this short instruction:
After copying new files you need to clear the Drupal cache: admin/config/development/performance.
Go to Changelog section, if there is announced changes by Features, then you need:
- Enable the module Features if it's not enabled.
- Go to main Features page: admin/structure/features
- Click on the NikaDevs section, select Progressive Features feature and click Save Changes
- Sometimes there is a changes in the nodetypes or views, in this case you will see Needs review in the STATE column.
- Click on the Progressive Features feature link. You will see a list of features with checkboxes. Select them all, or only which you need and click Revert components. Note what if you made some changes in this fields/views/image styles or other features, this operation will revert them.
Changelog
Version 1.6 - March 7, 2018
Updated: All modules
Updated: Core
Fixed: Minor Bugs
Version 1.5 - March 1, 2017
After updating nd_visualshortcodes you need to run update.php script, open the Settings page for SHORTCODES and DYNAMIC SHORTCODES text formats and enable the SAVED SHORTCODES shortcode.Updated: All modules
Added: Saved shortcodes feature
Fixed: Minor Bugs
Version 1.3 - December 9, 2015
After updating CKEditor library open each CKEditor profile (admin/config/content/ckeditor) and simply save it.Updated: All modules
Updated: Mega Slider
Updated: CKEditor
Fixed: Bug caused by Media module
Fixed: Minor Bugs
Version 1.2 - July 20, 2015
Updated: All modules
          Updated: Mega Slider
          Fixed: Shop Attributes
          Fixed: Minor Bugs
Version 1.1.2 - January 23, 2015
Updated: All modules
          Fixed: Minor Bugs
Version 1.1.1 - October 13, 2014
Fixed: Minor Bugs
Version 1.1.0 - September 17, 2014
Requires the update by Features for using the Blog Timeline.
Added: Blog Timeline
          Added: One Page View
          Added: RTL Support
          Fixed: Minor Bugs
Version 1.0.1 - September 1, 2014
Fixed: Minor Bugs
Version 1.0.0 - August 18, 2014
Initial release